[PR]上記の広告は3ヶ月以上新規記事投稿のないブログに表示されています。新しい記事を書く事で広告が消えます。
https://keepstreams.com/how-to-use-videoproc-converter
I want to edit a video, but is there any free and inexpensive software I can use?
I want to make a live gameplay video.
I want to make a free video download, but how do I use it?
Today, we will show you how to use VideoProc Converter, a video processing software that can convert videos and DVDs, download videos and music, edit videos and record screenshots, and more all in one software. We will also show you how to use KeepStreams Download, an alternative to VideoProc that allows you to download videos from mainstream video streaming services.
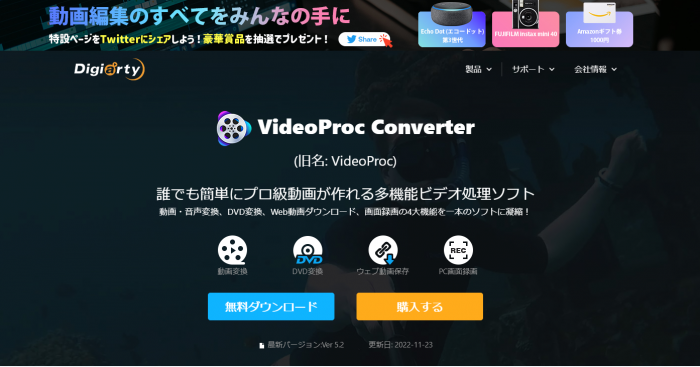
VideoProc Converter, formerly known as "VideoProc," is a video processing software that offers video and DVD conversion, video and music downloading, video editing, and screen recording all in one. Vlogger" has also been added. In other words, the old "VideoProc" has been divided into the "VideoProc Converter" with the same functions and the "VideoProc Vlogger" where you can enjoy video editing.
VideoProc Converter and VideoProc Vlogger are video processing software developed by a multi-software company called Digiarty Software, Inc.
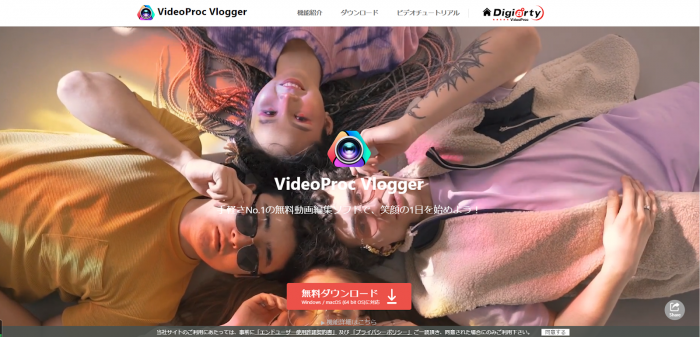
Unlike "VideoProc Converter," which specializes in video conversion and video downloading, "VideoProc Vlogger" is a specialized video editing software. All features are available free of charge, and it is highly recommended for beginners who want to try some video editing.
If you want to convert videos, download videos, record screens, and do simple editing such as cropping and cropping, VideoProc Converter is a better choice. This is because VideoProc Converter has four major functions that anyone can easily create videos with in a single software package.
The following is an explanation of each of the four functions in turn.
VideoProc Converter has a wide variety of video editing functions.
VideoProc Converter's video editing features include
VideoProc Converter is a video converter that combines high speed and high quality.
Video Conversion:.
Video of almost any format can be supported.
MP4, MKV, AVI, WebM, WMV, MOV, M4V, MPEG2, DIVX, 3GP
Audio Conversion.
Extract audio from video files and DVDs and save them as audio files.
MP3, AAC, WAV, M4R, AIFF, FLAC, AC3, AAC, OGG, CAF
VideoProc Converter's download function allows you to download videos and music from over 1000 video sites. Simply copy the URL of the video and download the online music or video in your favorite format.
You can check the available download sites from the following sites.
List of "VideoProc Converter" free video and music sharing sites
VideoProc Converter's screen recording feature allows you to record the entire PC screen or a selected area of the screen with audio. This makes VideoProc Converter ideal for recording gameplay videos, creating instructional and e-learning content, and recording live broadcasts and livestreams. There are three specific features
There are two versions of VideoProc Converter: free and paid. Please refer to the following information for the differences in product features.
| Free version |
Product Features |
Free Trial Version |
Paid Version |
|---|---|---|---|
|
Video Converter |
Convert video to various formats |
5-minute limit |
|
|
Use of the latest video processing and editing tools |
 |
|
|
|
High-speed conversion support |
|
|
|
|
Video Editing & Video Recording Screen Recording |
Combine multiple videos into one |
5 minute limit at the beginning of each video |
|
|
Erase watermarks added during recording |
|
|
|
|
Convert recorded video to other formats |
5 minute limit |
|
|
|
Video Saving |
Number of M3U8 video downloads |
3 times limit |
Unlimited |
|
Supported online video sites |
50+ |
1000+ |
|
|
Number of web videos that can be downloaded |
10 videos limit |
Unlimited |
|
|
Other |
Upgrade support to latest version |
|
|
|
24-hour technical support response |
|
|
The free version has a 5-minute limit on video editing and conversion; you can record up to 5 minutes of video, but the recorded video will be watermarked. Some editing tools are not available and fast video conversion is not possible, so it may be difficult to use.
The paid version comes in three patterns: annual plan (for 3 PCs), perpetual license (for 1 PC), and permanent license (for 2 PCs). We find it easy to use, as there are no restrictions on video conversion, editing, and recording, and there are more than 1,000 supported sites.
The VideoProc Converter's recording feature is easy to use, even for beginners. As mentioned above, whether you want to record a live game play, record and save a live broadcast or live stream, or create an instructional video, VideoProc Converter is a great tool to use.
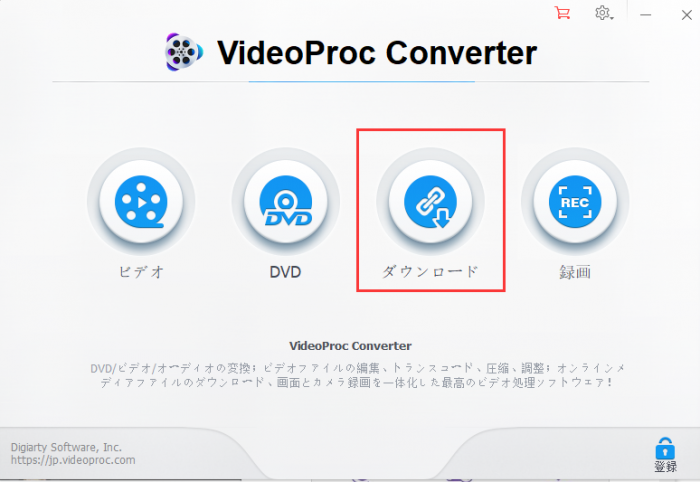
Step 1) Launch VideoProc Converter and click the "Record" button.
Step 2) You will be redirected to the Recording page. Click on "Screen Recording."
After the entire screen is previewed, click "REC" in the lower right corner.
(Instructions are also displayed on the page, so you can easily follow them.)
Step 3) A countdown will begin. Recording will start.
Step 4: On a PC, press "CTRL + ALT + SHIFT + R" to stop recording and automatically save the file to the specified file; on a Mac, press "ESC" to stop recording and cancel the recording.
You can also record a specified range!
If you want to record not the entire PC screen, but only a portion of the screen, use the "Crop" function.
Before clicking "REC" in step 2) above, click "Crop" in the lower left corner to select the recording area.
Then a light blue frame will appear along with the window as shown below. Move the cursor over the bridge of the light blue frame to resize it.
Once you have adjusted the size of the recording area, click the "REC" button in the lower right corner to start recording.
Camera Recording & Wipe Camera Video Functions
Select "Camera Recording" on the right side of the "Screen Recording" button, and you will see two modes: "Camera Recording" and "Screen Recording & Camera Recording".
Camera Recording" records video from the PC's built-in webcam or a USB-connected camera device. Clicking on "Screen & Camera Recording" will bring up a wipe as well as the ability to record the PC screen. This function is often used to create things like live game videos or learning content videos.
The next step is to learn how to download videos with VideoProc Converter, which allows you to download videos and music from over 1000 video sites. It is an essential software that allows you to easily download online videos, live broadcasts, live games, etc. and save them in any format so that you can spend your free time enjoying videos at home.
Step 1 Launch VideoProc Converter and click the "Download" button.
Step 2) Click on "Add Video".
Step 3) Paste the URL of the video you want to download and then click the "Analyze" button on the right side.
Step 4) A list of videos with the same link will appear on the left side. Select the video you wish to download and click the "Download" button on the bottom right.
If there are options on the right side regarding resolution and subtitles, check each file before downloading. Also. It is also possible to download audio only, in which case, select "Audio Only".
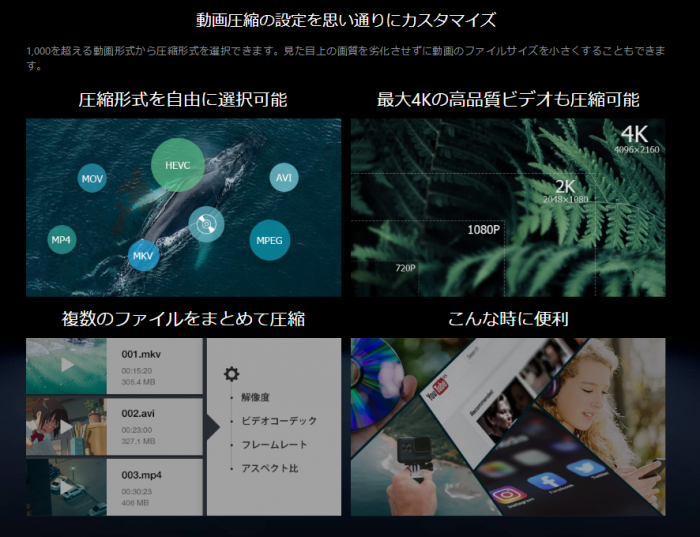
VideoProc Converter has a good reputation for being useful enough for beginners because it can compress and save videos without quality loss, download playlists and YouTube videos in batches, and has a free version with a 5-minute limit on video editing, converting, and recording functions, but no complicated editing. The free version has a good reputation for being usable enough for beginners because there is no complicated editing.
Some may have chosen the paid version because of the "Videoproc Recorder" watermark on the recording function and the limited video editing and recording functions, but unfortunately, the paid version also got a bad reputation.
Although advertised as being able to download from over 1,000 video sites, VideoProc Converter's screen recording feature is actually a feature that is not available on major streaming services such as Netflix, Amazon Prime Video, and Disney+. +. None of these sites support DRM technology. These sites all use DRM technology, which means that once recorded, the playback screen will go dark.
In addition, VideoProc Converter's functionality is Windows compatible, but not Mac compatible.
Therefore, we recommend using KeepStreams, a software to download videos from mainstream video streaming services.
KeepStreams is a professional PC software for downloading streaming videos and is compatible with Windows and MAC.
KeepStreams supports most OTT platforms, movie streaming services, most TV streaming services, animation streaming services such as Funimation and Crunchyroll, Twitch and ESPN Plus It supports live streaming services such as Twitch and ESPN Plus, various social networks such as YouTube, Facebook, Instagram, Twitter, etc., and is a very convenient way to download and enjoy movies, live TV, animated series, videos on social networks, etc. offline with just one device. It is a very convenient software that allows you to download and enjoy not only movies, but also live TV, animated series, videos from social networks, etc. offline.
> List of services supported by KeepStreams
With KeepStreams, you can download videos from more video streaming services than VideoProc Converter, and you can download videos directly from the built-in browser without the hassle of screen recording.
How to Download Videos with KeepStreams
Here are the steps to download videos with KeepStreams Downloader.
Step 1: Install KeepStreams Downloader
Click here for "KeepStreams Free Download
Step 2) Launch KeepStreams and click "Netflix" under "VIP Services" on the left side Enter your ID and password to log in to your NetFlix account.
Step 3) Select the video you wish to download and enter the "Ebisodes and More Information" page.
Step 4) KeepStreams will automatically start analyzing the video URL and enter the download screen.
Step ⑤ Select the episode, quality, audio and subtitles you want to download, then click the "Download Now" button.
With VideoProc Converter's recording feature, even beginners can easily record live game play, record and save live broadcasts and live feeds, and create instructional videos.
However, even the paid version of VideoProc Converter does not support major streaming services such as Amazon Prime Video and Disney+, so we recommend using KeepStreams, a professional PC software for downloading streaming videos! KeepStreams is the best solution for downloading streaming videos.
With KeepStreams, you can download videos from more video services than VideoProc Converter, and you can easily download not only movies, but also offline live TV, animated series, videos on social networks, and more, making it easy for anyone to use. It is a useful software. Try it and see for yourself.
Reblogged from:https://sorekosoft.jp/dvd-rce-protection-removal#_Toc65338
RCE (Regional Coding Enhancement)とは、一部のDVDメディア制作側がリージョン1(R1)DVDに配置した追加の保護レイヤーであり、DVDがリージョンフリーまたはマルチリージョンのDVDプレーヤーで再生されないようにしています。
DVD業界の分野で世界を1~6までのリージョンコードに分類します。RCEプロテクション付きのDVDは、DVD側と一致したリージョンコードが付いているDVDプレーヤーだけで再生できます。DVDのリージョンコードは、地球儀で番号が記載されているボックスの背面を見ると確認できます。

DVDがお住まいの地域での使用に適していない場合は、そのパフォーマンスに最適な地域の種類を通知するマップが表示されます。これらのビデオや映画を再生するには、RCEプロテクションを解除できるソフトウェアが必要です。以下では、RCEプロテクションを簡単に削除できるいくつかのソフトをご紹介します。
DVDFab Passkey for DVDは、市場で入手可能な最強のDVDコピーガード解除ソフトであり、 RCEプロテクションを含む、あらゆるDVDコピーガードを素早く削除できます。解除後のDVDコンテンツは自由に再生したり、別のソフトウェアで編集したりすることができます。

DVDFab Passkey for DVDでRCEを解除する手順は次のとおりです。
Linux、Mac、Windowsで利用できる無料のDVDリッピングソフトウェアです。UOP、CSS、リージョンコードなどのコピーガードを解除して、DVDをビデオファイルを変換できます。ただし、高度なコピーガードは処理できません。


HandbrakeでRCEを解除する方法は、次のとおりです。
WindowsおよびMacで利用可能なビデオファイルの変換とDVDのリッピングソフトです。RCE、APS、UOPなどの通常のDVDコピーガードを削除できます。高度なDVDコピーガードを処理することはできません。

DVDSmithでRCEを解除する手順は次のとおりです。
これでリージョンコードやCSSなどのコピーガードは、自動的に削除されます。
DVD Shrinkは、DVDを自由に圧縮して、DVDビデオディスクのバックアップコピーを作成できるフリーソフトです。ライティングソフトウェアと組み合わせて使用すれば、DVDの書き込みもできるようになります。
DVD ShrinkでRCEプロテクションを解除する方法は以下のとおりです。

以下のメッセージが出たら、『リージョンを指定する』にチェックして、リージョンを2に指定して、「OK」を押します。

「バックアップ」ボタンを押し、保存先を決定して、「OK」ボタンをクリックしましょう。
以下では、RCE以外、よく使われるDVDコピーガードの種類をご紹介いたします。
これは、市販のDVDに適用されるDVDの違法コピーと視聴を防止するためのデジタル著作権管理スキームです。 1996年に導入されたCSSは、DVDコンテンツの配布を禁止しています。
UOP(ユーザー操作禁止)は、DVDに設定されているデジタル著作権禁止スキームへの参照でもあります。ユーザーは、ディスク内に保存されているコンテンツを変更しようとすると、FBI警告などの著作権情報が表示されます。
これは、ソニーによって設計および開発されたコピープロテクト技術で、CSS(コンテンツスクランブルシステム)の上に追加の保護カバーを提供します。ユーザーがDVDファイルをコピーしようとすると、このプロテクトが故意にDVDに破損したセクターを形成します。
この保護システムはMacrovisionによって設計されました。お客様がAPS保護のマークが付いたDVDを盗用またはコピーしようとすると、コピーされたコンテンツが判読不能で文字化けします。
これは、Appleによって開発されたデジタル著作権管理技術です。MP4ファイルの形式で存在する暗号化されたAACオーディオレイヤーとして機能します。 DVDを本物で承認されたデバイスでのみ実行できます。これは、著作権で保護された作品、特にiTunes ストアを通じて販売されている作品の保護を促進します。
これらは、記録可能なメディアまたは事前記録されたメディアのコンテンツ保護の略語です。これは、DVDプレーヤーまたはラップトップ上のデジタルコンテンツの削除、移動、またはコピーの作成を管理するメカニズムです。
以上では、RCE及び他の様々なコピーガードを解説して、RCEを簡単に解除できるソフトも紹介しました。DVDFab Passkey for DVDのような優れたDVD解読プログラムを利用すれば、DVD RCEリージョンについて心配する必要はありません。元のコンテンツを変更せずにDVDからRCE保護を削除するのは非常に簡単です。このソフトは有料ですが、無料で体験できます。完全無料のソフトでRCEプロテクションを解除したい場合は、Handbrake、DVD Shrinkを使用してみましょう。
https://y2mate.ch/playon-on-roku
PlayOn is a well-known, powerful, and highly functional media server that allows users to record and download content from popular streaming services. It supports over 25+ streaming services, including Netflix.
Among all, Roku is at the top. So many people wonder how does PlayOn work with Roku? If you are also one of them, we have covered you!
In this article, we will take you through how you can add PlayOn on Roku by following the procedure and getting the PlayOn Roku channel code. Without further ado, let’s explore a complete guide on how to add PlayOn to Roku and cast it.
When you think about getting PlayOn on Roku, the first thing that comes to mind is how does PlayOn work with Roku, or should I add PlayOn on Roku? So, remember that getting PlayOn on Roku significantly adds to your convenience.

Adding PlayOn on Roku gives a feel as the content has reached the audience with some visual ecstasy. Indeed, Roku itself supports many channels, but when you get access to PlayOn on Roku, you can eventually stream whatever you like on your Roku TV.
For more options about Kigo, you can read Kigo Review and 2022 Kigo Black Friday.
Here are some notable features and benefits of having PlayOn on Roku:
Roku allows you to download but does not allow live recording. Add PlayOn on Roku to record live streaming shows and movies from more than 25 channels. You can record with PlayOn on mobile as well as PC.
You can set up a subscription to your favorite shows, and the PlayOn Home will automatically activate to record the new episodes of the season as soon as they are available on the channel.
The advertisements between the climax of the story are the most irritating events. To avoid these unpleasant recurrent ads, add PlayOn on Roku. You can watch recordings on your Roku, and PlayOn will automatically skip the ads to let the story flow smoothly.
If you are going through a hectic routine and your favorite show is also about to expire from streaming services. Don't worry, and get the PlayOn Roku App. It allows the user to record the show in high resolution and watch it even after it has removed from Netflix or other streaming services.
PlayOn Roku channel code allows you to stream the videos to your streaming service from your phone, tablet, desktop, or any other device.
Regardless if the video is your creation or belongs to a series or movie which is not available on Roku, add PlayOn on Roku to enjoy any of your videos or pictures on this streaming service.
Roku is a beneficial platform offering a wide range of services and channels on one page, but PlayOn Roku will take your streaming experience to another level. But to achieve this, you should know how to add PlayOn to Roku or how does PlayOn work with Roku. So, keep reading to get your answer.
Are you stuck with PlayOn Amazon is not working? Give this article a quick read to learn how you can get it fixed!
PlayOn is officially available on the Roku channel store, so you can add PlayOn on Roku anytime. Follow the procedure given below to PlayOn cast to Roku.

1. Now, look for the Search Channel option. Enter PlayOn and search for it from the virtual keyboard appearing on the screen. Once you find PlayOn click on it.

2. Click the Add Channel button, the process will begin. Once it completes, hit OK.
3. Finally, select the Go to Channel option to launch PlayOn.
In case your remote or Roku device is not working, you can use the PlayOn Roku app, which helps navigate through and assist in adding channels on Roku. To add the channel with the PlayOn Roku app, follow these steps:
Once you have submitted the application, the request will be processed in 24 hours. If you want an immediate response, you will have to update Roku.
Once you have learned how to add PlayOn to Roku, the PlayOn cast to Roku is still a mystery for many users. To help solve the query and answer how does Playon work with Roku, here we have mentioned simple steps. Follow them to get the answer.
Indeed, PlayOn on Roku is priceless due to its astonishing and high-quality features. They complement each other. Anyhow, remember that there is always an alternative that can replace even the top-ranking services.
If you do not play PlayOn and are looking for a better alternative, you are at the right place. We have got something similar and even more functional at an affordable price. Yes! We are talking about the Y2Mate DRM Downloader. It is a valuable downloader that supports all streaming services and is on almost all devices.
This is one of its kind video downloaders which can compete with high-end applications while staying within your budget. Here are some of the top features of Y2Mate DRM Downloader, making it a considerable alternative to PlayOn.

In this section, we have summarized all the noteworthy features that Y2mate DRM Downloader comes with. Give them a quick read to learn about how Y2Mate makes the best alternative to PlayOn.
This is the most considerable feature while making any decision. Regarding quality, it is hard to beat Y2Mate. It downloads videos in HD quality or up to 1080p, which is enough to compete with any expensive downloader. Moreover, it is an ideal video downloader in terms of audio as it can download videos with various audio tracks like AC3 5.1, etc.
Late for the trip, and the device is still not loaded with the episode. You need a Y2Mate DRM Video downloader. It will always keep you on time by downloading the hours-long movie in minutes.
This highly functional Video downloader allows you to download multiple episodes simultaneously. Make a queue and download them all together in a batch. After some time, you will have all episodes for offline watch.
Y2Mate enables downloading content from over 500 platforms, including 40 subscription-based platforms. It’s surprising how a minimal subscription fee can give you access to downloading such a huge number of streaming services.
It is one of the most appreciable features. If you have downloaded or recorded a live stream with Y2Mate, it will automatically remove the ads and create a smooth flow of all episodes. Grab your snacks and be ready for an endless stream of ad-free episodes.
If you consider the feature of this downloader, you may think that it must cost you hundreds of dollars. Fortunately, this is not the case. Y2Mate is an affordable software that costs nothing more than $19.9 per month. ANd it is more affordable if you buy its yearly plan at $59.9 per year.
PlayOn is a well-known and functional software, but when you add PlayOn on Roku, sometimes it causes errors, and people claim PlayOn Amazon is not working. To avoid these issues, we suggest you get a hand on the Y2Mate DRM Downloader.
It is affordable and highly functional software available on almost all devices. It allows instant and batch downloads, so make a queue and have all episodes on your device in a while.
Reblogged from:https://sorekosoft.jp/craving-explorer#_Toc46602
皆さんは「YouTubeのユージックビデオをMP3でダウンロードしたい。」または「YouTubeの動画をダウンロードしたい」など思ったことはないでしょうか?よくあるオンライン変換サイトなどはウイルスに感染する場合も多く、また変換が難しい場合もありますよね。
今回はそんな悩みを払拭するフリーソフト「Craving Explorer」を紹介致します。このソフトを使うと簡単に上記の変換を行う事が可能です。ぜひご覧ください。

Craving Explorer(クレイビングエクスプローラー)とは、フリーソフトで、動画サイトから動画や音声を抽出してダウンロードすることが可能なブラウザです。
*従来のCraving Explorerは、既に開発が終了しました。現在のCraving Explorer 2は、Google Chrome、Microsoft Edgeと同様に、Chromiumベースのブラウザになったので、動画や音声のダウンロードだけでなく、日常のWebブラウジングとして利用しても便利です。
対応動画や音楽サイト:

メリット:
YouTubeを始めとした動画サイトから動画・音声をダウンロードするために、Webサイトでのダウンロードサービスを利用しているユーザーは多いのですが、Webサービスだとファイルの形式が選択できなかったり、ダウンロード速度が安定しないといったデメリットも抱えています。
Craving Explorerなら、ファイル形式の選択を行うことが可能で、ダウンロード速度も一定の速度で安定してダウンロードを行うことができるのがとても便利な点です。
まずは肝心の「Craving Explorer」のインストーラーをダウンロードします。

上のリンク先からインストーラーをダウンロードしてください。
リンク先が開いたら「無料ダウンロード」をクリックすれば、ダンロードが始まります。
1、 Craving Explorer のインストール方法は、まずダウンロード先のフォルダに「Craving Explorer」のインストーラーをダブルクリックで起動しましょう。

2、 使用許諸契約書が表示されますので内容をよく確認して、「同意する」にチェックをして「次へ」ボタンをクリックします。

3、次にアプリケーションの宣伝項目が表示されます。余計なアプリケーションたちです。全てのチェックを外して「次へ」ボタンをクリックします。絶対に忘れてはいけません。

自分が希望していないソフトが勝手にインストールされてしまいます。このソフトがなぜ宣伝されているのかと言うと、Craving Explorer制作会社の方たちが他製品のソフトを宣伝することでその宣伝した会社から報酬を受け取っているということです。Craving Explorerが無料で使える裏にはこのような事が起きているのですね。
ソフトの種類はバージョンごとに入れ替わったりしますが、共通してとにかく全部チェックをはずすことが大切です。
4、次に「インストール」ボタンを押すと、インストールがすぐに始まります。Craving Explorer 2が自動でC:\Program Files\Craving Explorer 2\Application\Craving Explorerにインストールされます。
インストールが終わるまで待ちます。

5、インストールが完了したら、「完了」ボタンを押します。Craving Explorer 2は、自動的に開きます。

これで Craving Explorer のインストールは完了です。
Craving Explorerのオプション設定を変更することでより使いやすくなります。Craving Explorer 2画面の右上隅にある「Craving Explorerの設定」のアイコンをクリックしましょう。

1、 項目の「YouTube」と「ニコニコ動画」は、ユーザー情報を登録しておくことで自動的にログインしてくれるようになります。これでサイトに移動した時のログインの手間を省くことができます。
2、 「設定」>「詳細設定」>「ダウンロード」>「保存先」項目では、「変更」をクリックしてダウンロードしたファイルの保存先フォルダを変更することが可能です。アクセスしやすいフォルダに変更しておくことをおすすめします。

「ダウンロード前に各ファイルの保存場所を確認する」を有効にすると、動画や音声をダウンロードする度に保存先を指定できます。
3、 ナビゲーションバーの右側にあるペイントバケツのアイコンをクリックして、Craving Explorerブラウザのバックグラウンドとコラムの数を設定することができます。

4、 ナビゲーションバーの右側にある「+」のアイコンをクリックして、便利なウィジットを追加できます。

以下では、YouTubeを例として、Craving Explorerを使用してオンラインサイトから動画や音楽をダウンロードして保存する方法をご紹介します。
1、 Craving Explorerを起動して、画面の中央にある「YouTube」のアイコンをクリックします。YouTubeでダウンロードしたい動画を再生してください。

2、 今回は適当なミュージックビデオを再生しました。すると、画面の右上にある矢印アイコンの下にオレンジ色の感嘆符が出ました。

矢印ボタンにカーソルを持っていき、ドロップダウンリストから希望な品質のMP4動画を選択します。すると、「名前を付けて保存」ウインドウが出てきます。ダウンロードする動画のファイル名を編集して、保存先を指定してから、「保存」ボタンを押してください。動画のダウンロードが開始されます。

複数の動画をダウンロード予約も可能です(同時ダウンロードはできません。あくまでもひとつずつ順番にDLしていきます)。
動画の音声だけダウンロードしたい場合は、MP3またはM4Aを選択しましょう。おすすめは、一番早くダウンロードできて汎用性のある「MP3」です。
4、 動画の画質を選択せずに、動画を直接ダウンロードして保存したい場合は、動画画面の下に表示された青色の「Video」ボタンを押してください。また、動画の音声だけをダウンロードする場合は、赤色の「Audio」ボタンを押しましょう。

以上が Craving Explorer の使い方です。

1、 インターネットの接続が不安定で、またはストレージの残り容量が足りないです。
Craving Explorerで「取得失敗」と表示されてダウンロードが行えない場合は、インターネットが接続されているかどうか、安定しているかどうかなど環境の確認を行いましょう。またストレージの残り容量が足りているかも確認しておきましょう。
2、 インターネット環境に問題がない場合、動画サイトの仕様変更などで取得に失敗している可能性があります。
この場合はCraving Explorerが最新のバージョンでないとダウンロードできないことがほとんどなので、最新バージョンかどうかを確認しましょう。
画面上部メニューの「ヘルプ」を開き「アップデートを確認」をクリックすると、アップデートがあるかどうかの確認が行われます。アップデートがある場合は、最新バージョンをダウンロードしてインストールしましょう。
3、 キャッシュが原因で削除できないケースもあります。
画面上部メニューの「ツール」を開き「インターネットオプション」をクリックしましょう。インターネットオプションが表示されたら、閲覧の履歴項目の「削除」ボタンをクリックします。「インターネット一時ファイルおよびWebサイトのファイル」「クッキーとWebサイトデータ」「ダウンロードの履歴」のチェックボックスをオンにしてから「削除」ボタンをクリックしてキャッシュを削除しましょう。

ダウンロードソフトのようなツールにはウイルスが混入されているかもしれない…と思っているユーザーをよく見かけます。
Craving Explorerにはウイルスは入っておらず、アンチウイルスソフトでチェックしても引っかからないので安心です。先程も紹介したデフォルトインストールだと不要なソフトがインストールされてしまう点は鬱陶しいですが、それ以外の部分は評判がよく、簡単に動画のダウンロードや音声抽出が行えるのでおすすめのフリーソフトとなっています。
注意点としましては、LIVE 動画はダウンロードできません。一度完全に動画が終了しており、動画ファイル自体がサイト上にアップロードされている動画のみダウンロードできます。リアムタイム放送のlive動画は保存できないので注意しましょう。
また、ソフトは安全なものですがダウンロードする動画には気をつける必要があります。本来有料の著作物などをダウンロードしてしまう「違法ダウンロード」を行うと犯罪となってしまいます。くれぐれもご注意ください。
Craving Explorerを使って動画の映像ファイルと音声ファイルを簡単にダウンロード出来ましたでしょうか。Craving Explorerを使えば、動画サイトから簡単に動画や音声をダウンロードすることができます。Webサービスを利用するよりも手軽にダウンロードが行えるほか、ファイル形式の選択が行えたり同時ダウンロードも可能ですよ。また、このソフトはYouTubeのみならずその他多数の動画共有サイトの映像、音声ファイル出力に対応しております。Craving Explorer使って動画音声保存ライフを楽しんでください。
Reblogged from:https://bestvideoconverter.org/ja/best-alternative-to-gigapixel-ai
-15995067841000.jpg)
あなたが撮影するビデオは、あなた自身の赤ちゃんに似ています。しかし、もちろん、私たちはプロではありません。そのため、品質の悪いビデオは首の痛みになり、あなたの平和を乱す可能性があります。それはまさにあなたがビデオ品質を向上させる方法を探し始めるときです。
動画に影響を与える理由はいくつかあります。問題のいくつかには、低解像度、暗い背景、ノイズの多い画像、逆さまに撮影されたビデオなどがあります。それこそが、ビデオ品質エンハンサーがこれらの悪いビデオに対処するための最良の選択肢の1つになり得る場所です。
さて、ビデオエンハンサーツールがビデオの品質を向上させるのに役立ついくつかの方法があります。さまざまなビデオエンハンサーの方法でビデオ品質を向上させる優れた機能を提供する傾向がある、さまざまなエンハンサーオプションがあります。
ビデオ品質の向上に使用される手法には、次のものがあります。
解像度を上げる。
アスペクト比、フレームレート、ビットレート、サンプリングレートなどのパラメータを調整します。
明るさ、コントラスト、彩度の最適化
可能な限り最高の外観上の変更を行う音楽、字幕などの他のデータの追加
ビデオ内の画像をトリミング、回転、反転します。
低品質のビデオにハイエンドのビデオエンハンサーオプションを提供すると主張するツールがいくつかあります。 AIまたは人工知能により、ビデオエンハンスメントの概念は、選択するのがかなり簡単で簡単なものになりました。実際、人工知能は私たちの生活の一部になっています。これにより、プロのビデオグラファーまたは愛好家としてのほとんどのニーズに対応するAI搭載のビデオ品質エンハンサーをチェックすることが非常に実用的になりました。
GigaPixel AIは、これまでのところ、この観点から最も優れたツールの1つとして評価されています。ビデオエンハンサーツールについて詳しく知り、さらに別の同様に強力なAI対応のビデオ品質エンハンサーとどのように競合するかを確認します。
WindowsとMacで利用可能なTopazGigapixel AI for Videoは、最高のAIビデオ拡張オプションの主要なオプションの1つです。画像アップスケーリングソリューションの正しい選択であると宣伝されています。もちろん、ツールによって提供されるビデオのアップスケーリングオプションは、そこにいるビデオファンがあまり面白くないと思うものではありません。
このソフトウェアは、私たち人間が知っているビデオや画像を強化するのに同じ心理学を使用しています。開発者のTopazは、このソフトウェアは何千ものビデオをテストして学習した後に開発されたと主張しています。ビデオ品質エンハンサーソフトウェアは、複数の入力ビデオフレームを利用して、画像とビデオの品質を向上させます。ビデオを最大8Kに改善する機能は、ビデオエンハンサーツールの明確なリーダーの1つになります。
ビデオエンハンスメントに関してそれを顕著なオプションの1つにするのは、人工的なアップスケーリングソフトウェアソリューションから得られる結果よりもはるかに見栄えの良い結果です。オンラインアップロードサービスを使用して画像を強化するか、スタンドアロンのデスクトップツールを選択して作業を行うことができます。
ビデオを最大8Kの解像度に拡張できます。それはおそらく、最大のnayビデオエンハンサーツールが達成できるはずです。
ツールは、できれば自動的に顔を洗練することができます。
Windows用の無料のベータ版にアクセスできます。
ツールのシステム要件はかなり高いです。仕様の低いデバイスには適さない場合があります。
バッチ変換オプションは使用できません
ツールにはファイルサイズの制限があります
ザ・トパーズギガピクセルAIfor Videoは、MacとWindowsの両方で利用できます。人工機械学習や顔認識などの手法を使用しています。それは理想的には、いくつかのギガピクセルAIレビューによると、まともなAIビデオの強化を提供するはずです。
ビデオ用ギガピクセルAIは、AIを搭載したビデオエンハンサーに関心のある人たちに人気がありますが、DVDFab引伸機AIは、1つ以上の方法でビデオ用のギガピクセルAIに代わる最高のビデオエンハンサーの1つです。このツールは、超解像技術を推進力として前進し、ビデオ、さらには画像を徹底的に強化または拡大するための巨大なサポートを提供します。
解像度を上げただけでは、ビデオ品質の向上は保証されません。 DVDFab引伸機AIは、ビデオ解像度の向上とともにビデオ品質を向上させます。これはおそらく、ビデオ用のギガピクセルAIや他の同様のツールのような他のツールとは一線を画すものです。 DVDFab引伸機AIは、ビデオを元の3倍鮮明にする多くのオプションと内部拡張機能を提供することができます。ビデオに詳細を追加し、480pから1080pにアップスケールすることでタスクを実現します。
Gigapixel AI for Videoのこの最良の代替手段は、古いDVDやその他のソースにある古い画像やビデオを革新的なより鮮明な画像やビデオに変えることができます。ビデオ用のギガピクセルAIの最良の無料代替品の1つであるDVDFab引伸機AIは、ビデオと画像を最大300パーセント拡大します。これにより、画像が非常に鮮明に見えます。
ビデオエンハンサーの開発は、クリエイターの努力なしではありません。 DVDFab引伸機AIは、ニューラルネットワークを利用した個々のピクセルのいくつかの難しい学習手順と分析を選択しました。
DVDFab引伸機AIは、間違いなく、ビデオエンハンスメントのための世界初の完全なディープラーニングソリューションです。 Topaz Gigapixel AI for Videoは機械学習と顔認識に依存していますが、Enlarger AIには、ディープラーニングビデオの強化と効率の向上を実現する他の多くの拡張機能が付属しています。このツールは、ビデオを480pから1080p(またはフルHD)または1080pから4Kに拡大できます。

Enlarge AIは、DVDリッパー、DVDクリエーターアルティメット、DVDコピーなどの他の製品と連携する別個のアドオンです。ビデオのニーズに合わせてこれらのプログラムやツールを使用する場合は、[AIを拡大]のオプションをオンにするだけで、ツールが効率的な方法で画質を即座に向上させます。
好みに応じて、プレミアム品質とウルトラ品質の2つの出力品質を確認できます。 Ultra Qualityを使用すると、ビデオがより鮮明になりますが、処理には時間がかかります。
DVDFab引伸機AIは、ビデオ品質を向上させるためにさまざまなテクノロジーを利用しています。使用されるいくつかの手法には、AI(ディープラーニングとニューラルネットワーク)が含まれます。 TensorFlow、NVIDIA CUDA、およびcuDNN。これらのテクノロジーの組み合わせにより、最高の品質で強化された洗練されたビデオが提供されます。
さて、あなたがそれからの製品のいずれかを使用しているならば、あなたは卓越した強化されたビデオ品質を選ぶのがかなり簡単であるとわかるはずです。
必要な手順は次のとおりです。の例を取り上げますDVDコンバーターこのチュートリアルの モード:
1. DVDFab EnlargeAIをダウンロードしてインストールします。デバイスにDVDFabスイートがすでにインストールされていることを前提としています。そうでない場合は、すぐにインストールしてください。

2.を使用して、ソースファイルを追加します。ローカルから追加または 追加モバイルから。ファイルをインターフェイスにドラッグアンドドロップすることもできます。
3.ファイルが追加されると、次のオプションが見つかります。引伸機AI レンチアイコンのすぐ後ろにあります。それを確認してください。

これでタスクが開始されます。引伸機AI機能は、ビデオを効果的に改善し、ビデオに可能な限り最高の拡張を適用します。
本質的に、ビデオ品質を向上させる方法を見つけて、ギガピクセルAIの最良の代替案を確認したい場合は、DVDFab引伸機AIが最適です。最高のAIビデオエンハンスメントオプションのための優れたソリューションであることがわかります。詳細についてはAIでDVDビデオの品質を向上させる。